How to Make Your Own Shiplap Range Hood
If you’re like me and don’t want to put a microwave above your range, but don’t actually have a venting duct and want the look of a custom hood, this DIY project is for you!
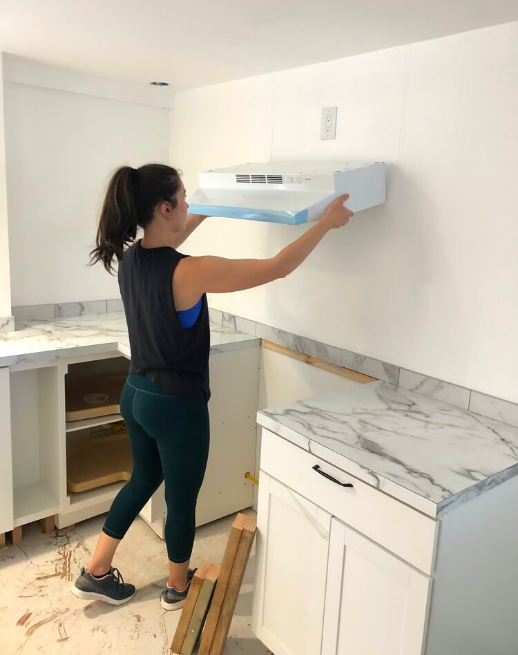
The first thing you’ll need to do is get a non-ducted range vent. We used a Braun vent from Amazon for under $40! Once you have the specifications of the vent you’re using, you’ll be able to make the frame to support your hood. You’ll want to identify the studs in the walls so you can make your frame so you can drill into the studs. If you don’t have studs, you’ll need to use drywall anchors.
I basically made a simple rectangle to mount the range vent on. You can use wood screws or a framing nailer. I used 2 x 4’s. because that’s what we had, but you can use smaller pieces, like 1x3’s if you like. See how I made the frame slightly smaller than the vent? That way, when I apply my shiplap, the shiplap is flush with the vent.


When you start nailing in your shiplap, start with the sides first, and the do the front last. That way the front pieces will cover the unfinished edges of your side pieces. I have typically used a quarter as a spacer, but you can definitely use an 1/8th inch tile spacer (what I used here), paint stick, or anything that gives you the spacing for the look you want. I used my cordless finishing nail gun and it was a piece of cake! You can also use wood screws if you don’t have a nail gun. Click the little arrow on the right on the video!
Last but not least, I caulked the edges where the shiplap meets the wall, and gave it some touch up paint. All in all, this is a fun project to complete, especially when you can get someone to cut the plywood into strips for you. The most tricky part would be figuring out where to nail your frame to the wall. This could easily be completed in a day’s work, and will add so much style to your kitchen!
The vent came with all the right hardware and screws. It was a two person job to screw in the vent to the wood frame, just because it was easier if someone was holding it up. Click the little arrow on the right of the video below to see the vent hood going into the wood frame we built!
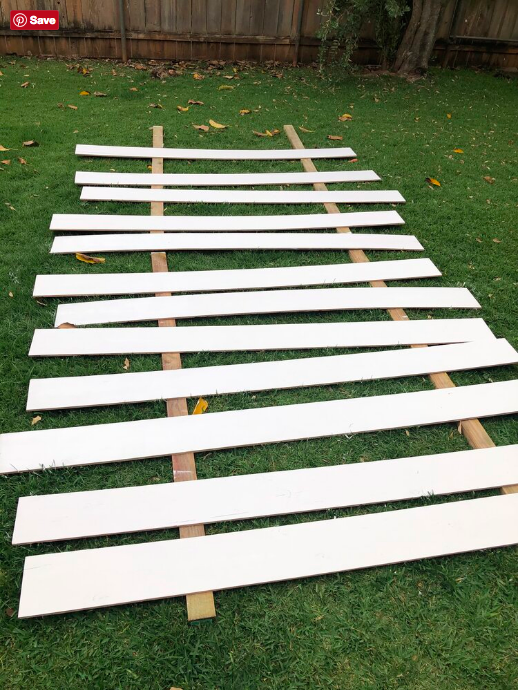
I chose to make my own shiplap, but you can definitely buy it as well. I used $30 plywood I got at Home Depot, and had them cut it for me in 4” strips (total lifesaver-track an associate down and ask them!). When I got home, I sanded the imperfections down with some 120 grit sand paper, and primed it with Kilz primer, two coats. Then I used some white interior Behr paint that I had leftover from painting my walls, and put applied two coats. I used a small foam roller from Home Depot as well. I find using a roller is way quicker than using a brush.