Adding Skylights - The Best Design Decision EVER.

Adding Skylights to our Kitchen
Our kitchen renovation is well underway, and I have been anticipating hitting this milestone for weeks. We haven’t even made if halfway and I am a thousand percent sure that this single move that I’m about to tell you about is the game changer of the project. Making this decision completely shifts the feeling of not only the kitchen, but also the entire living area tangibly as soon as you step though the front door. Alright, out with it already you say. Ok ok, here it is - S K Y L I G H T S. Yup, not just one but two. Let me break down the process for you, how we landed on skylights, the brand we chose and how much it cost.
But first, a R E C A P:
It's Week 3 of the Fall 2020 One Room Challenge and here's where we are at with our kitchen renovation:
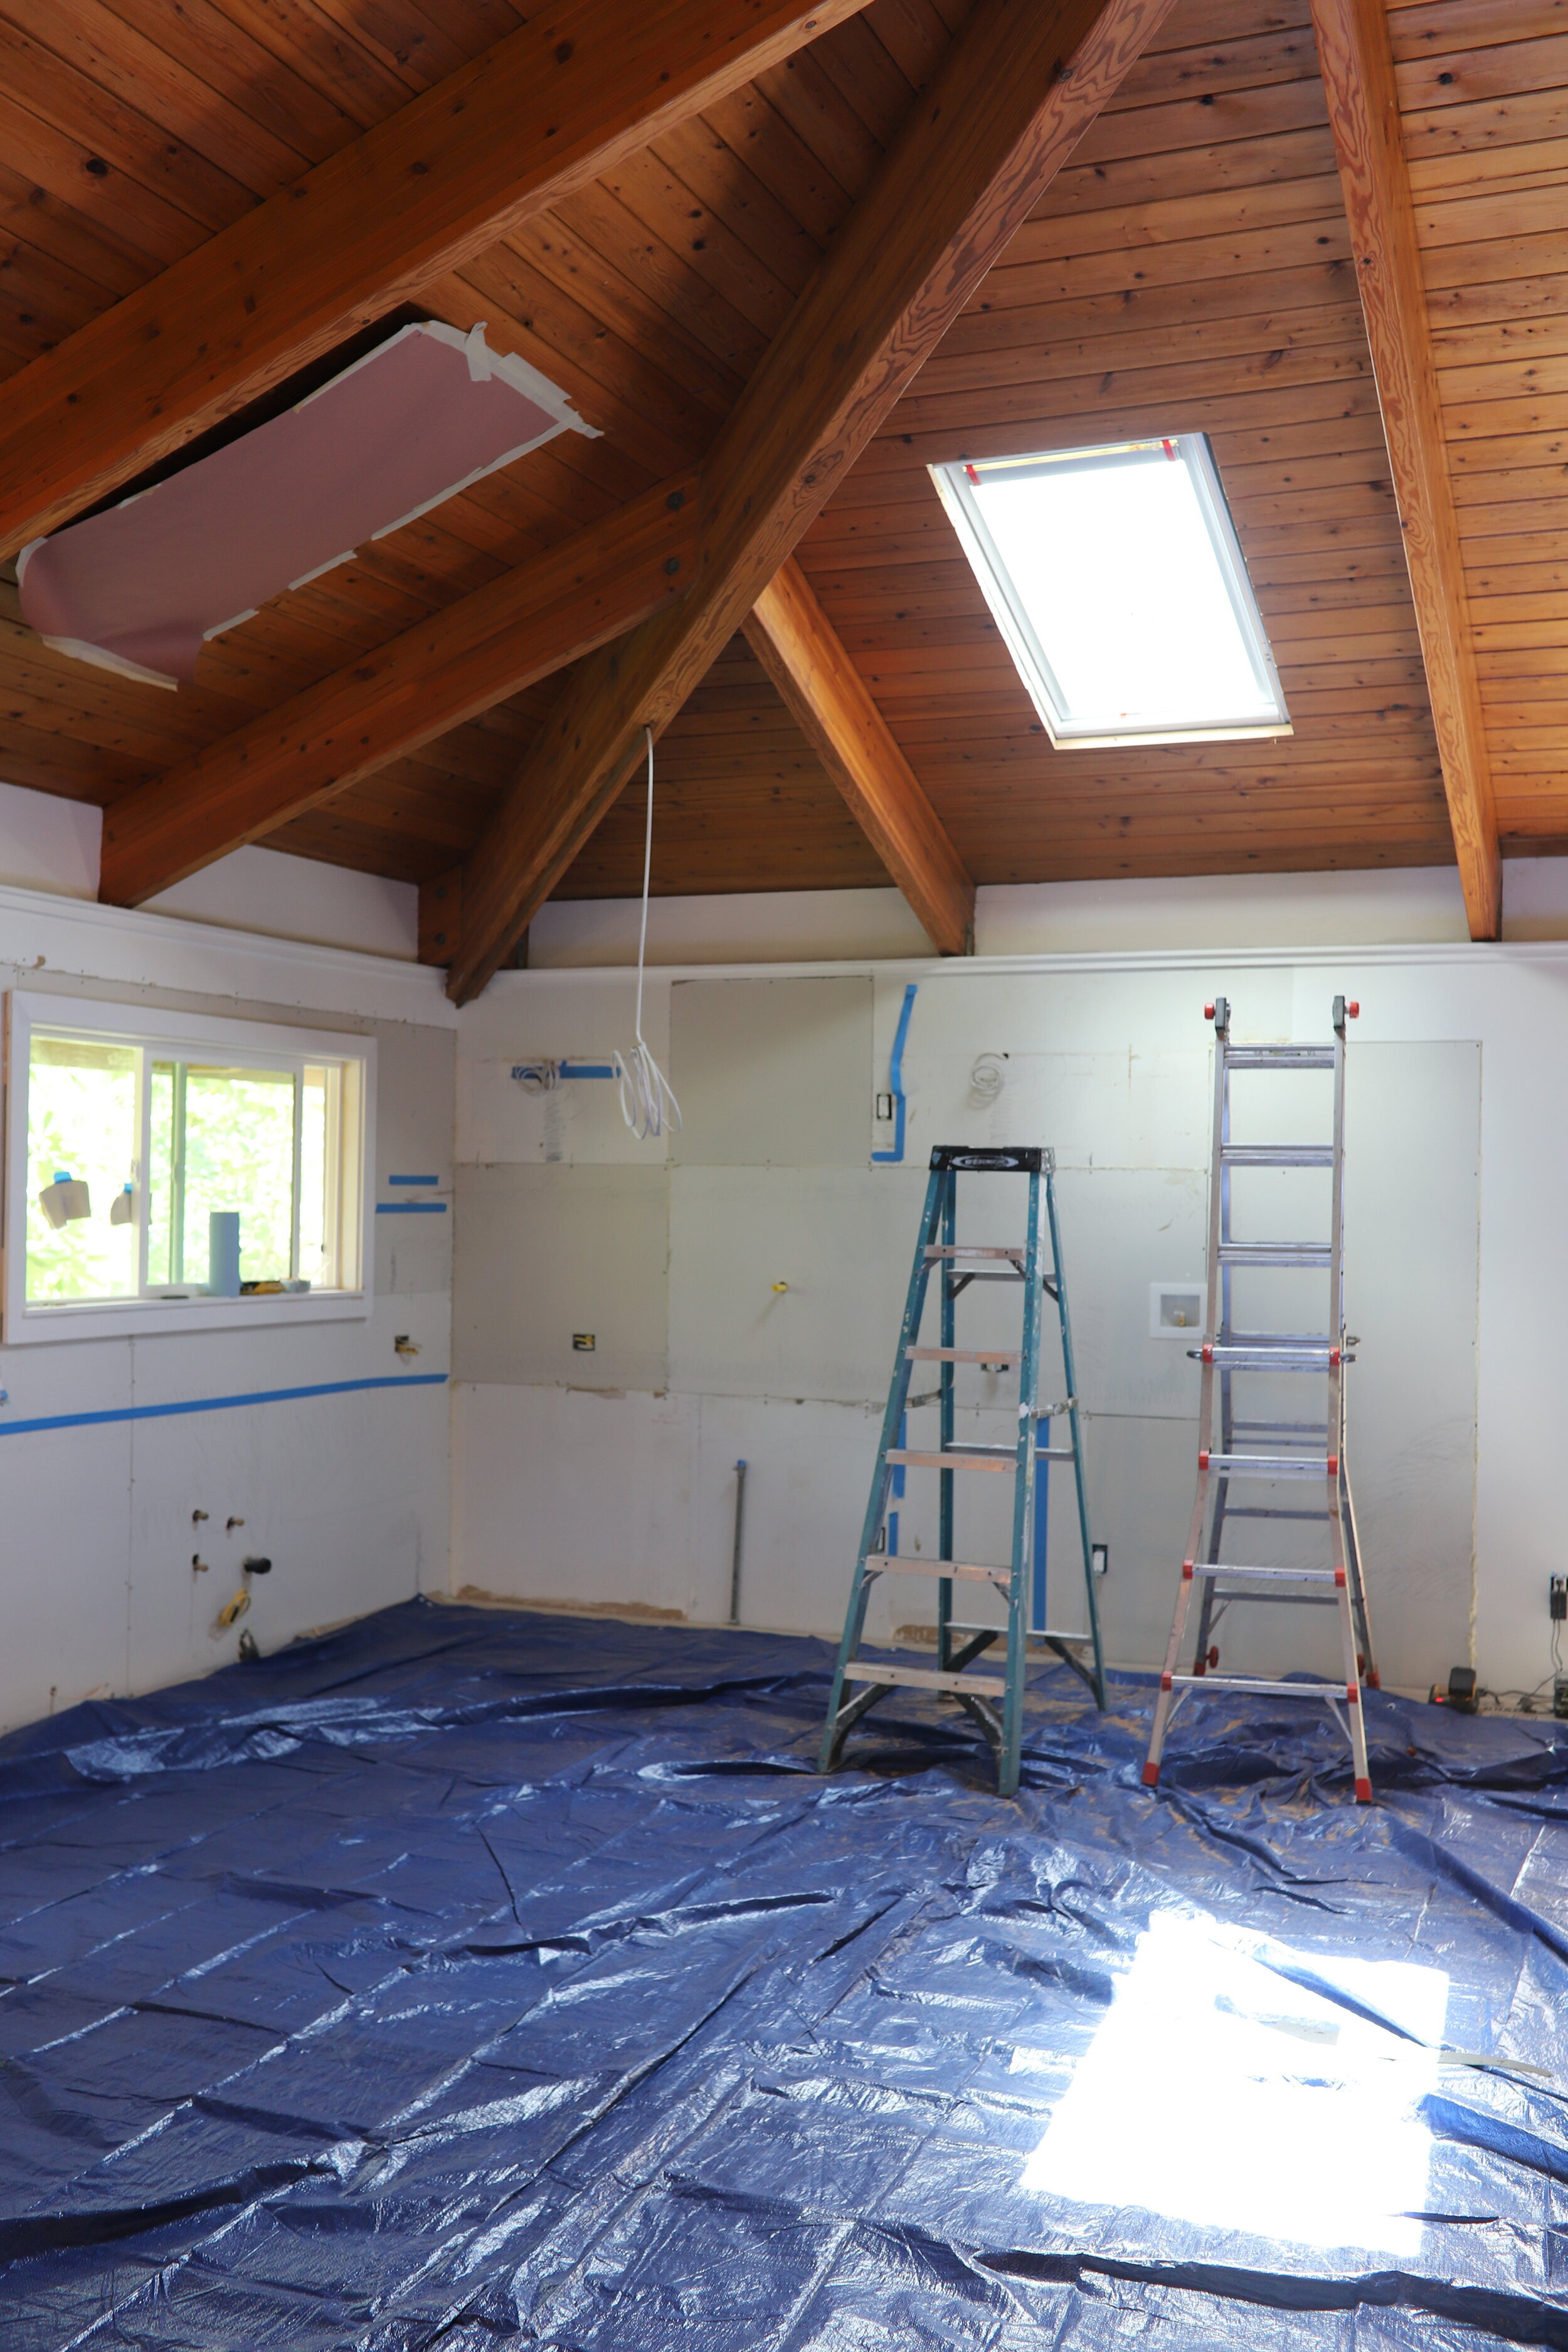
Demo - DONE
Electrical + Plumbing - DONE
Flooring - DONE
Cabinets - Assembly in process
Countertops
Backsplash
Floating Shelves
Rangehood
Appliance Install
Eek, it's going to be tight. We have just 3 more weeks to complete some pretty big aspects of the design plan. But we're on track and we're hustling day and night (cue Kid Cudi throwback). Ok, enough of the stressful stuff, let’s get down to why I’m raving about our skylight decision so much.

A LITTLE BACKGROUND
One of the reasons we bought this house was because of the stunning tall ceilings. We loved the natural look but once we moved in we realized how dark the room was. But what about all the windows you ask? Oddly enough, they don't really let a lot of natural light in because of the close proximity we are to our neighbors. Instead of the sun shining into the room as it goes up or down, the natural light is blocked by the houses surrounding ours. That’s one downside of living in Hawaii, you have what seems like inches between homes because land is such a premium.
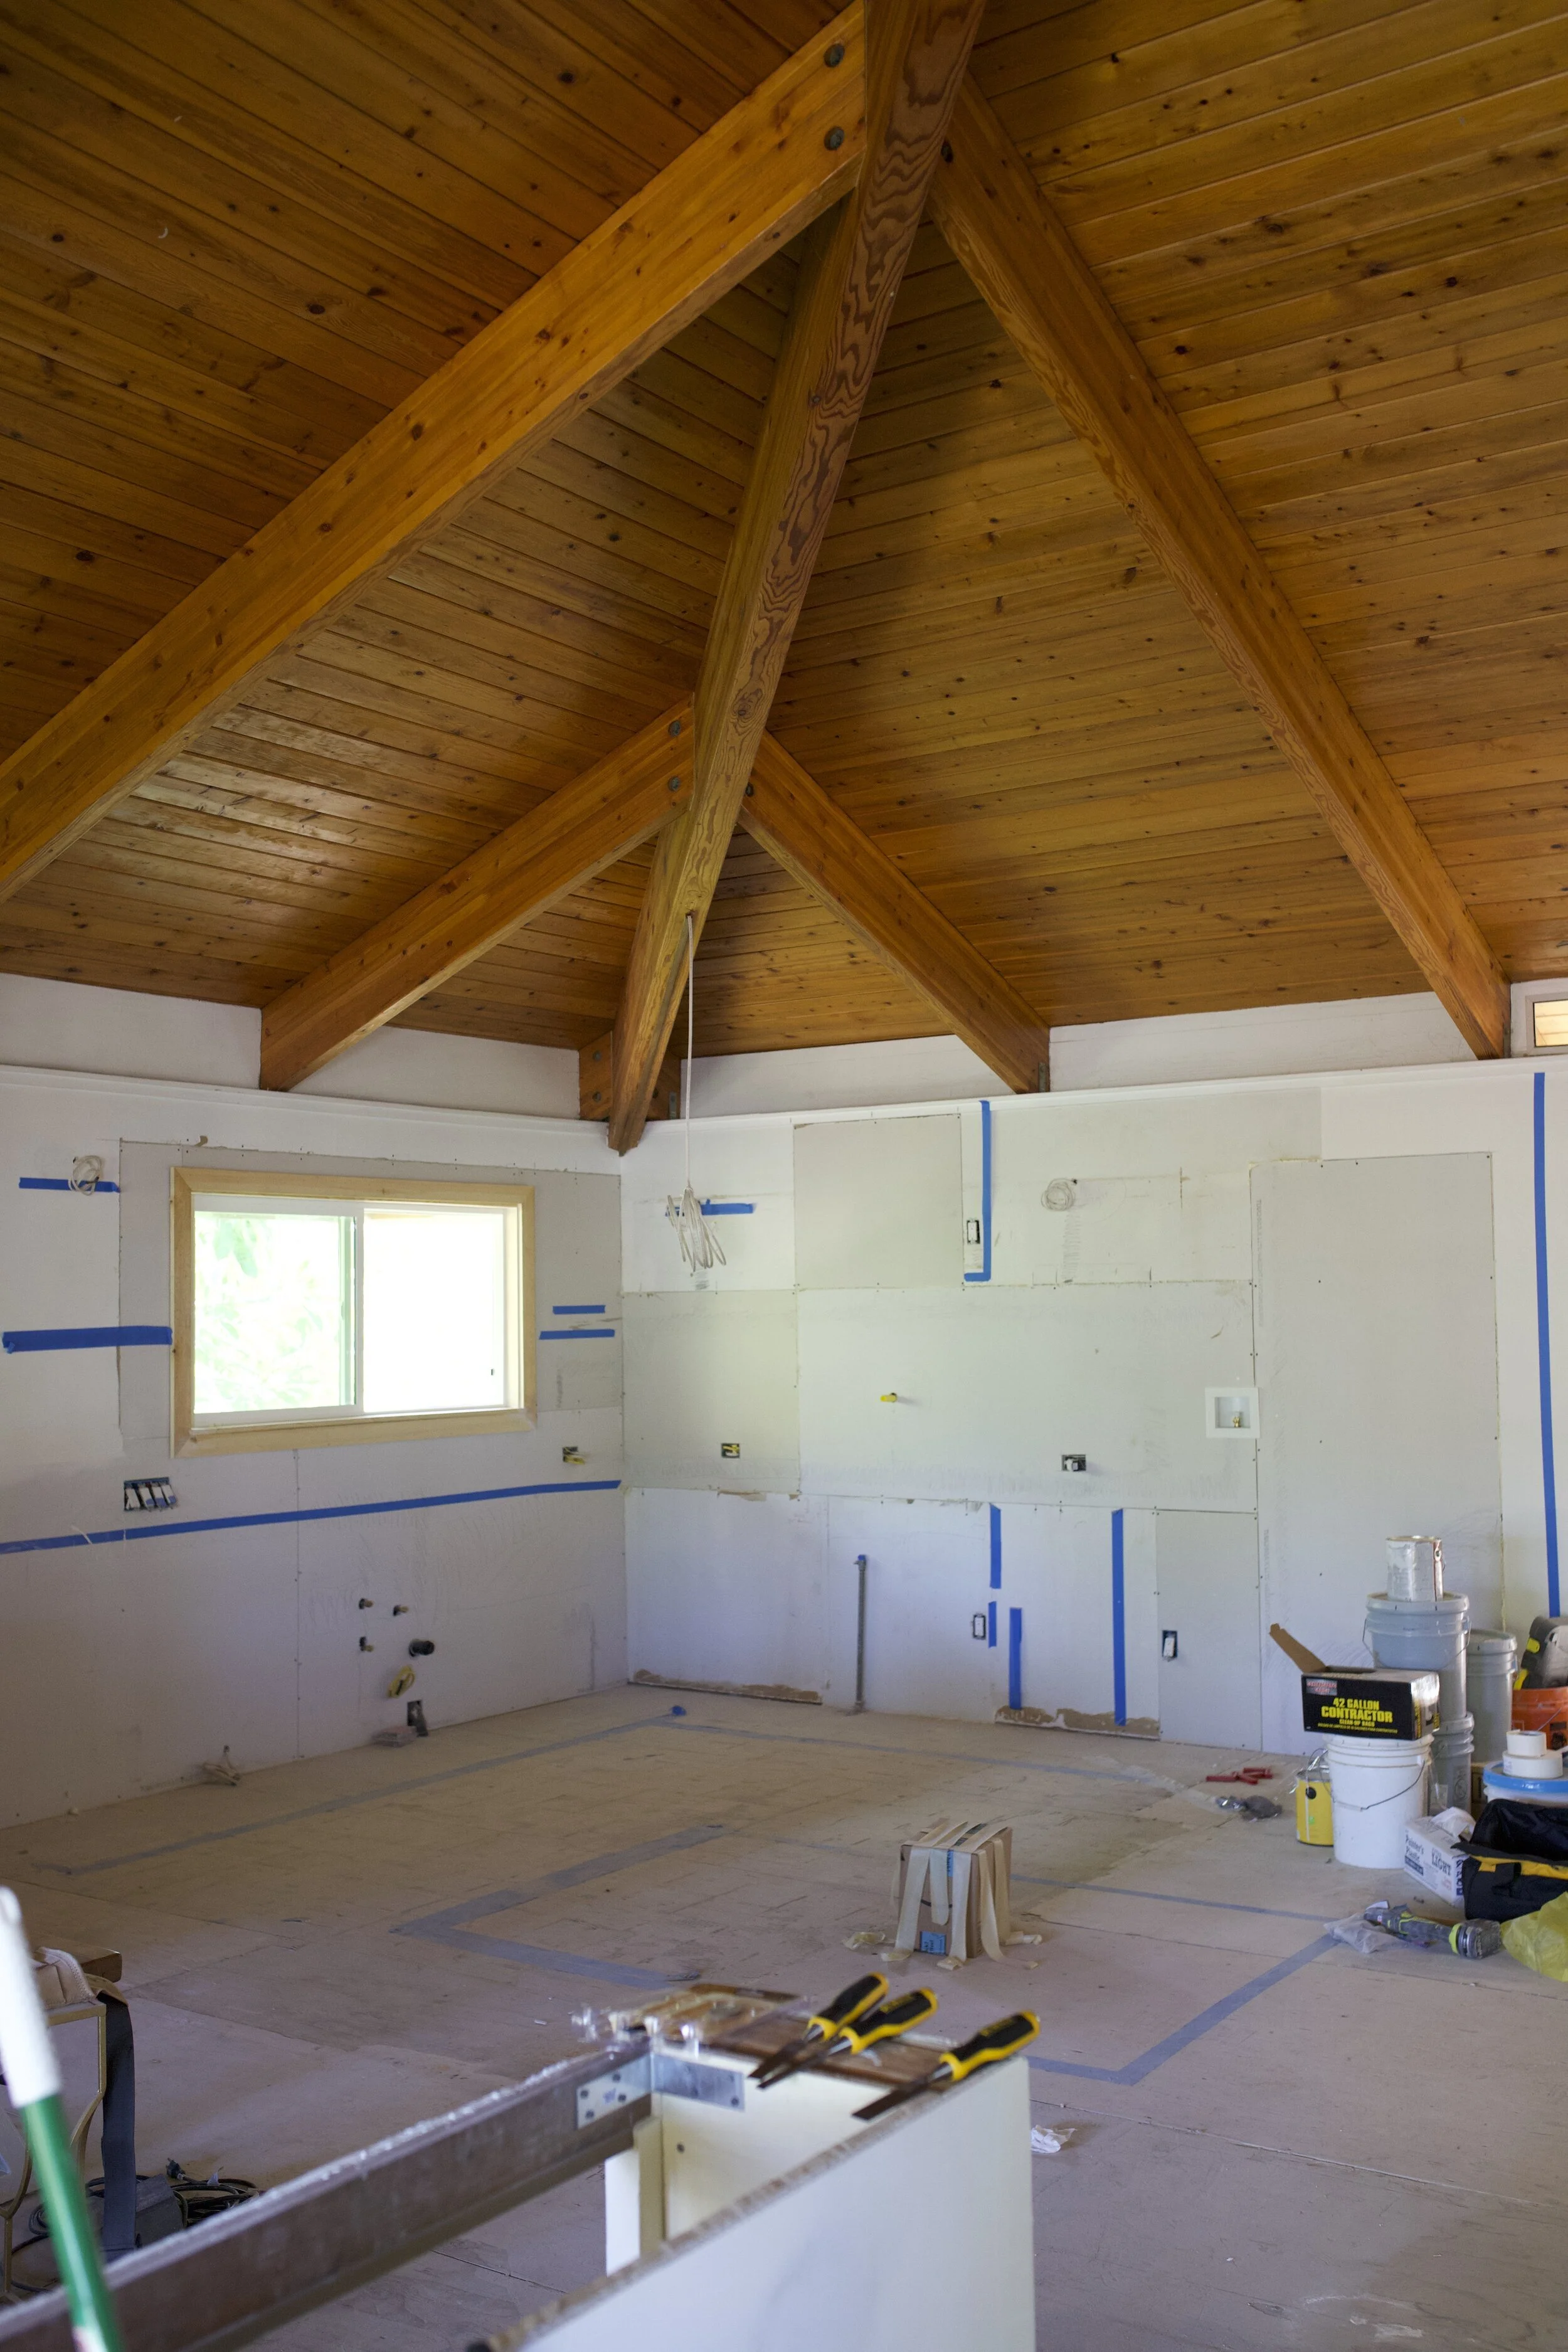
After demo
A FEW OTHER IDEAS
We considered a couple other things to brighten up the space before we landed on skylights. Naturally our first thought was painting the tongue and groove between the beams white. Something just didn't sit well with me when I thought of painting all that wood. What if I changed my mind in a year and wanted the natural wood back? Mike would not go for sanding all that wood. The next thing we got a quote for was adding drywall between the beams and adding canned lights. The cost was even more expensive than painting. Suddenly it dawned on us, what about a skylight? Natural light is priceless, and plus, if we could find ones that opened and closed, we could get rid of the ugly screens on the top of the walls that vented all the hot air (and also let in a lot of geckos).
OUR SKYLIGHT REQUIREMENTS
After doing some extensive research on a few different brands, we decided that we wanted to go with the leaders in the industry- VELUX. We chose the VELUX Solar Powered No Leak “Fresh Air” Skylights. This product checked all of our boxes:
Vent-able/able to open to let out hot air
Glass blocks most UV rays
Blinds or shades to give us light control
Solar-powered (no hardwiring required)
Rain sensors and automatic closing (it rains a LOT in Hawaii)
In addition, these skylights also come with a 10 year No Leak warranty on the product and installation (you must install them according to the instructions provided by VELUX, including using the VELUX flashing kit), that’s huge. When we first started investigating the skylight route, I admit I was a little nervous after hearing stories from a few friends saying they had to replace their skylights after 5 years or so when they were growing up, but a 10 year warranty makes me feel totally confident.
THE COST
Once we decided that we were going to go with VELUX, I put some feelers out to see if they’d be interested in a partnership- and thankfully, they were. We got a discount on the skylights, but you can click here to see the price range of what your cost would be for a single skylight installation, including product and labor. Your ceiling (flat or vaulted) will come into play, and whether any structural modifications will need to be made to the roof structure. One thing to note is that if you install the solar powered skylights and blinds you can get a 26% federal tax credit. And side note, in 2021 that solar tax credit drops down to 22%.
For install, went with On Top Roofing, a local company here in Hawaii. And for the install of our two VELUX Skylights, we paid ~$3, 200. Now, I’m not sure if that price would go down if you already have existing skylights that just need replacing - it may. We did not have any skylights so it possibly may have been a bit more labor intensive (more time means increased labor costs) to cut new openings in the roof. We got a few quotes, some came in higher, some came in lower, but overall we are happy with our decision to go with On Top Roofing, and they did an excellent job.
INSTALLATION PROCESS
The night before the contractors arrived we taped up pieces of construction paper, cut to dimension, and arranged them where we wanted the skylights to be. We of course agonized back and forth over micro adjustments, but I wanted to make sure I was happy with the placement from every angle. This step took a chunk of the guesswork out of the cutting process for our contractors, and saved us time on install day. If you work with a VELUX 5-Star Skylight Specialist, they will provide advice on the size and placement of your skylights.
STEP 1
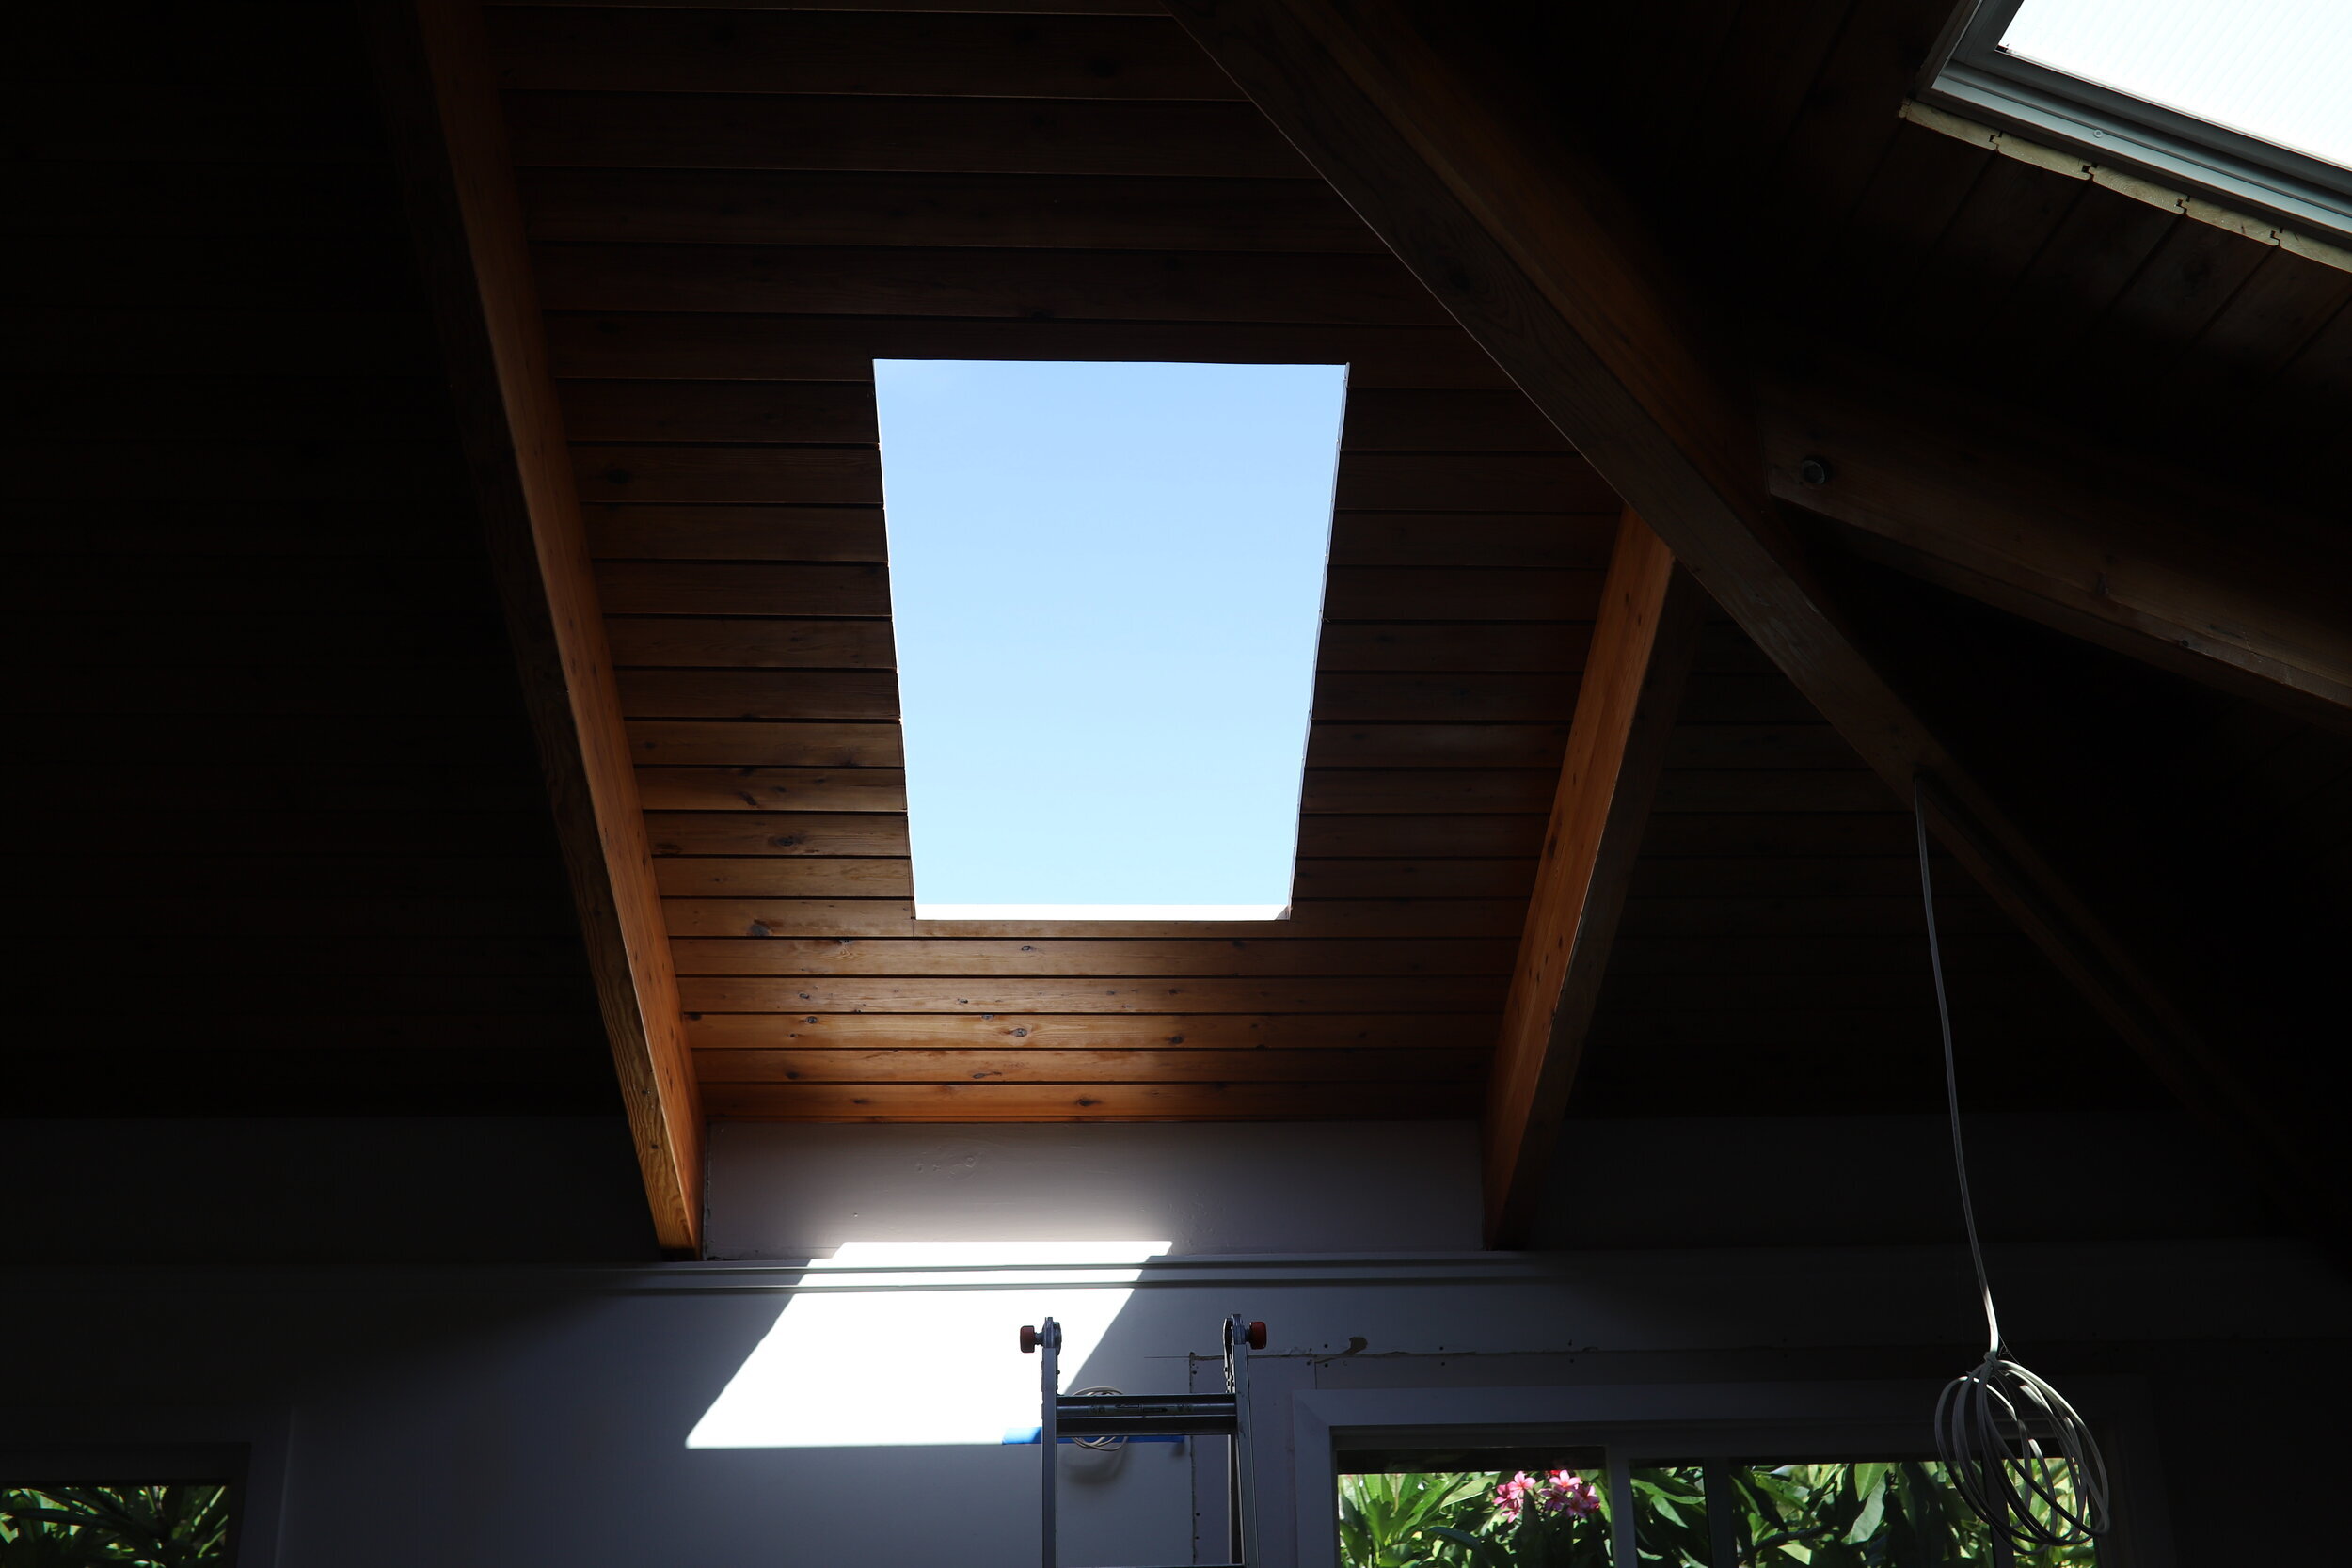
On the day of install, the first thing the guys from On Top Roofing did was to take a laser level and make an outline of precisely where they would cut, according to our taped up construction paper. Then they cut through the roof from the top. I was surprised at how little was between the inside of our ceiling and the outside world. For some reason I thought our ceiling was much thicker, but it was really just the tongue and groove then the shingles. As soon as they cut the first hole for the skylight, and the sun was shining through, I knew we had made the right choice and was absolutely over the moon.
STEP 2
Next we lifted the skylight up through the roof and the guys nailed down the deck seal to the roof deck. Then, the all-weather underlayment was installed around the skylight. Lastly, the step flashing was installed. You can watch more detail of the exact process here. All three of these steps make the skylight “No Leak”, and the VELUX flashing kit is required for the 10 year No Leak warranty.
STEP 3
Lastly we trimmed out the interior of the skylight with some pine that we stained the same color as the tongue and groove and tested the skylights. Each skylight came with remotes that controlled our white solar powered shades as well as opening and closing them. I’m obsessed with the shades because they allow a lot of light to come through while eliminating a glare.
You can also use the VELUX Active Smartphone App to open and close the skylights and blinds from your phone, whether you’re at home or away. The VELUX Active system also has an option to automate your skylights. With an indoor sensor that monitors temperature, humidity and CO2 levels and a connection to an online weather station, the system will automatically open our skylights to refresh the indoor air or proactively lower the shades for temperature control, if the day is forecast to be hot. Pretty neat, huh?
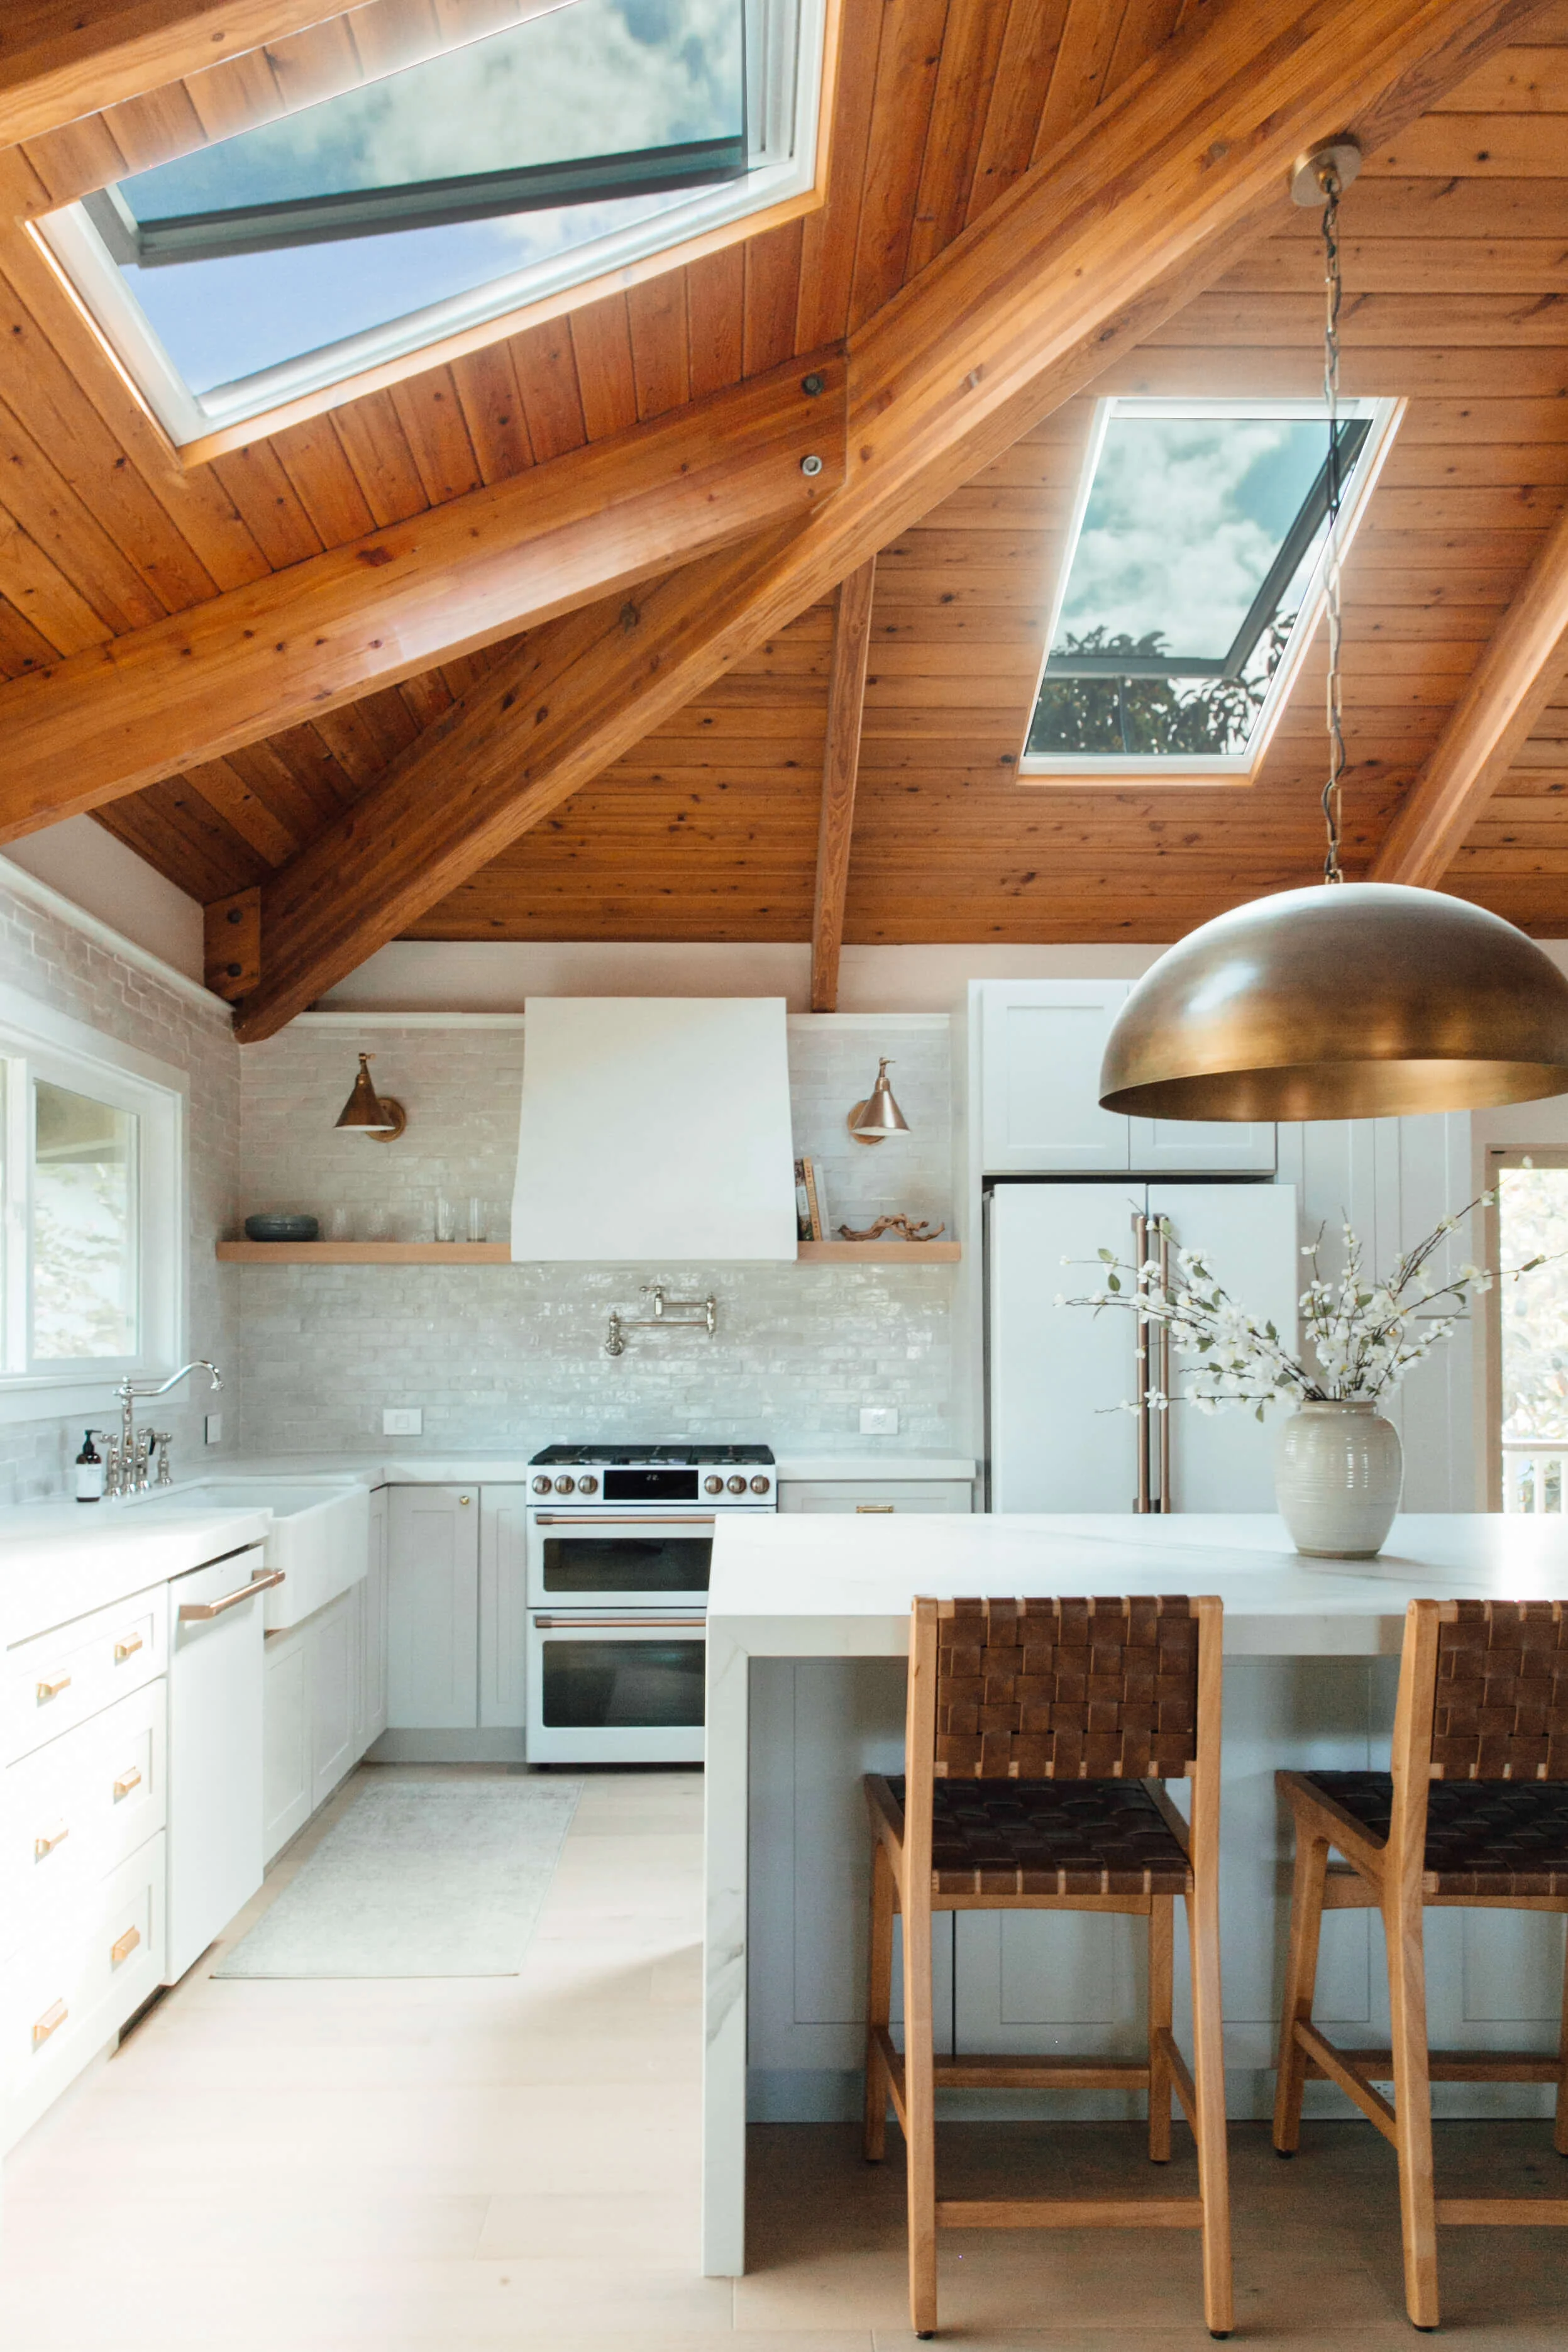
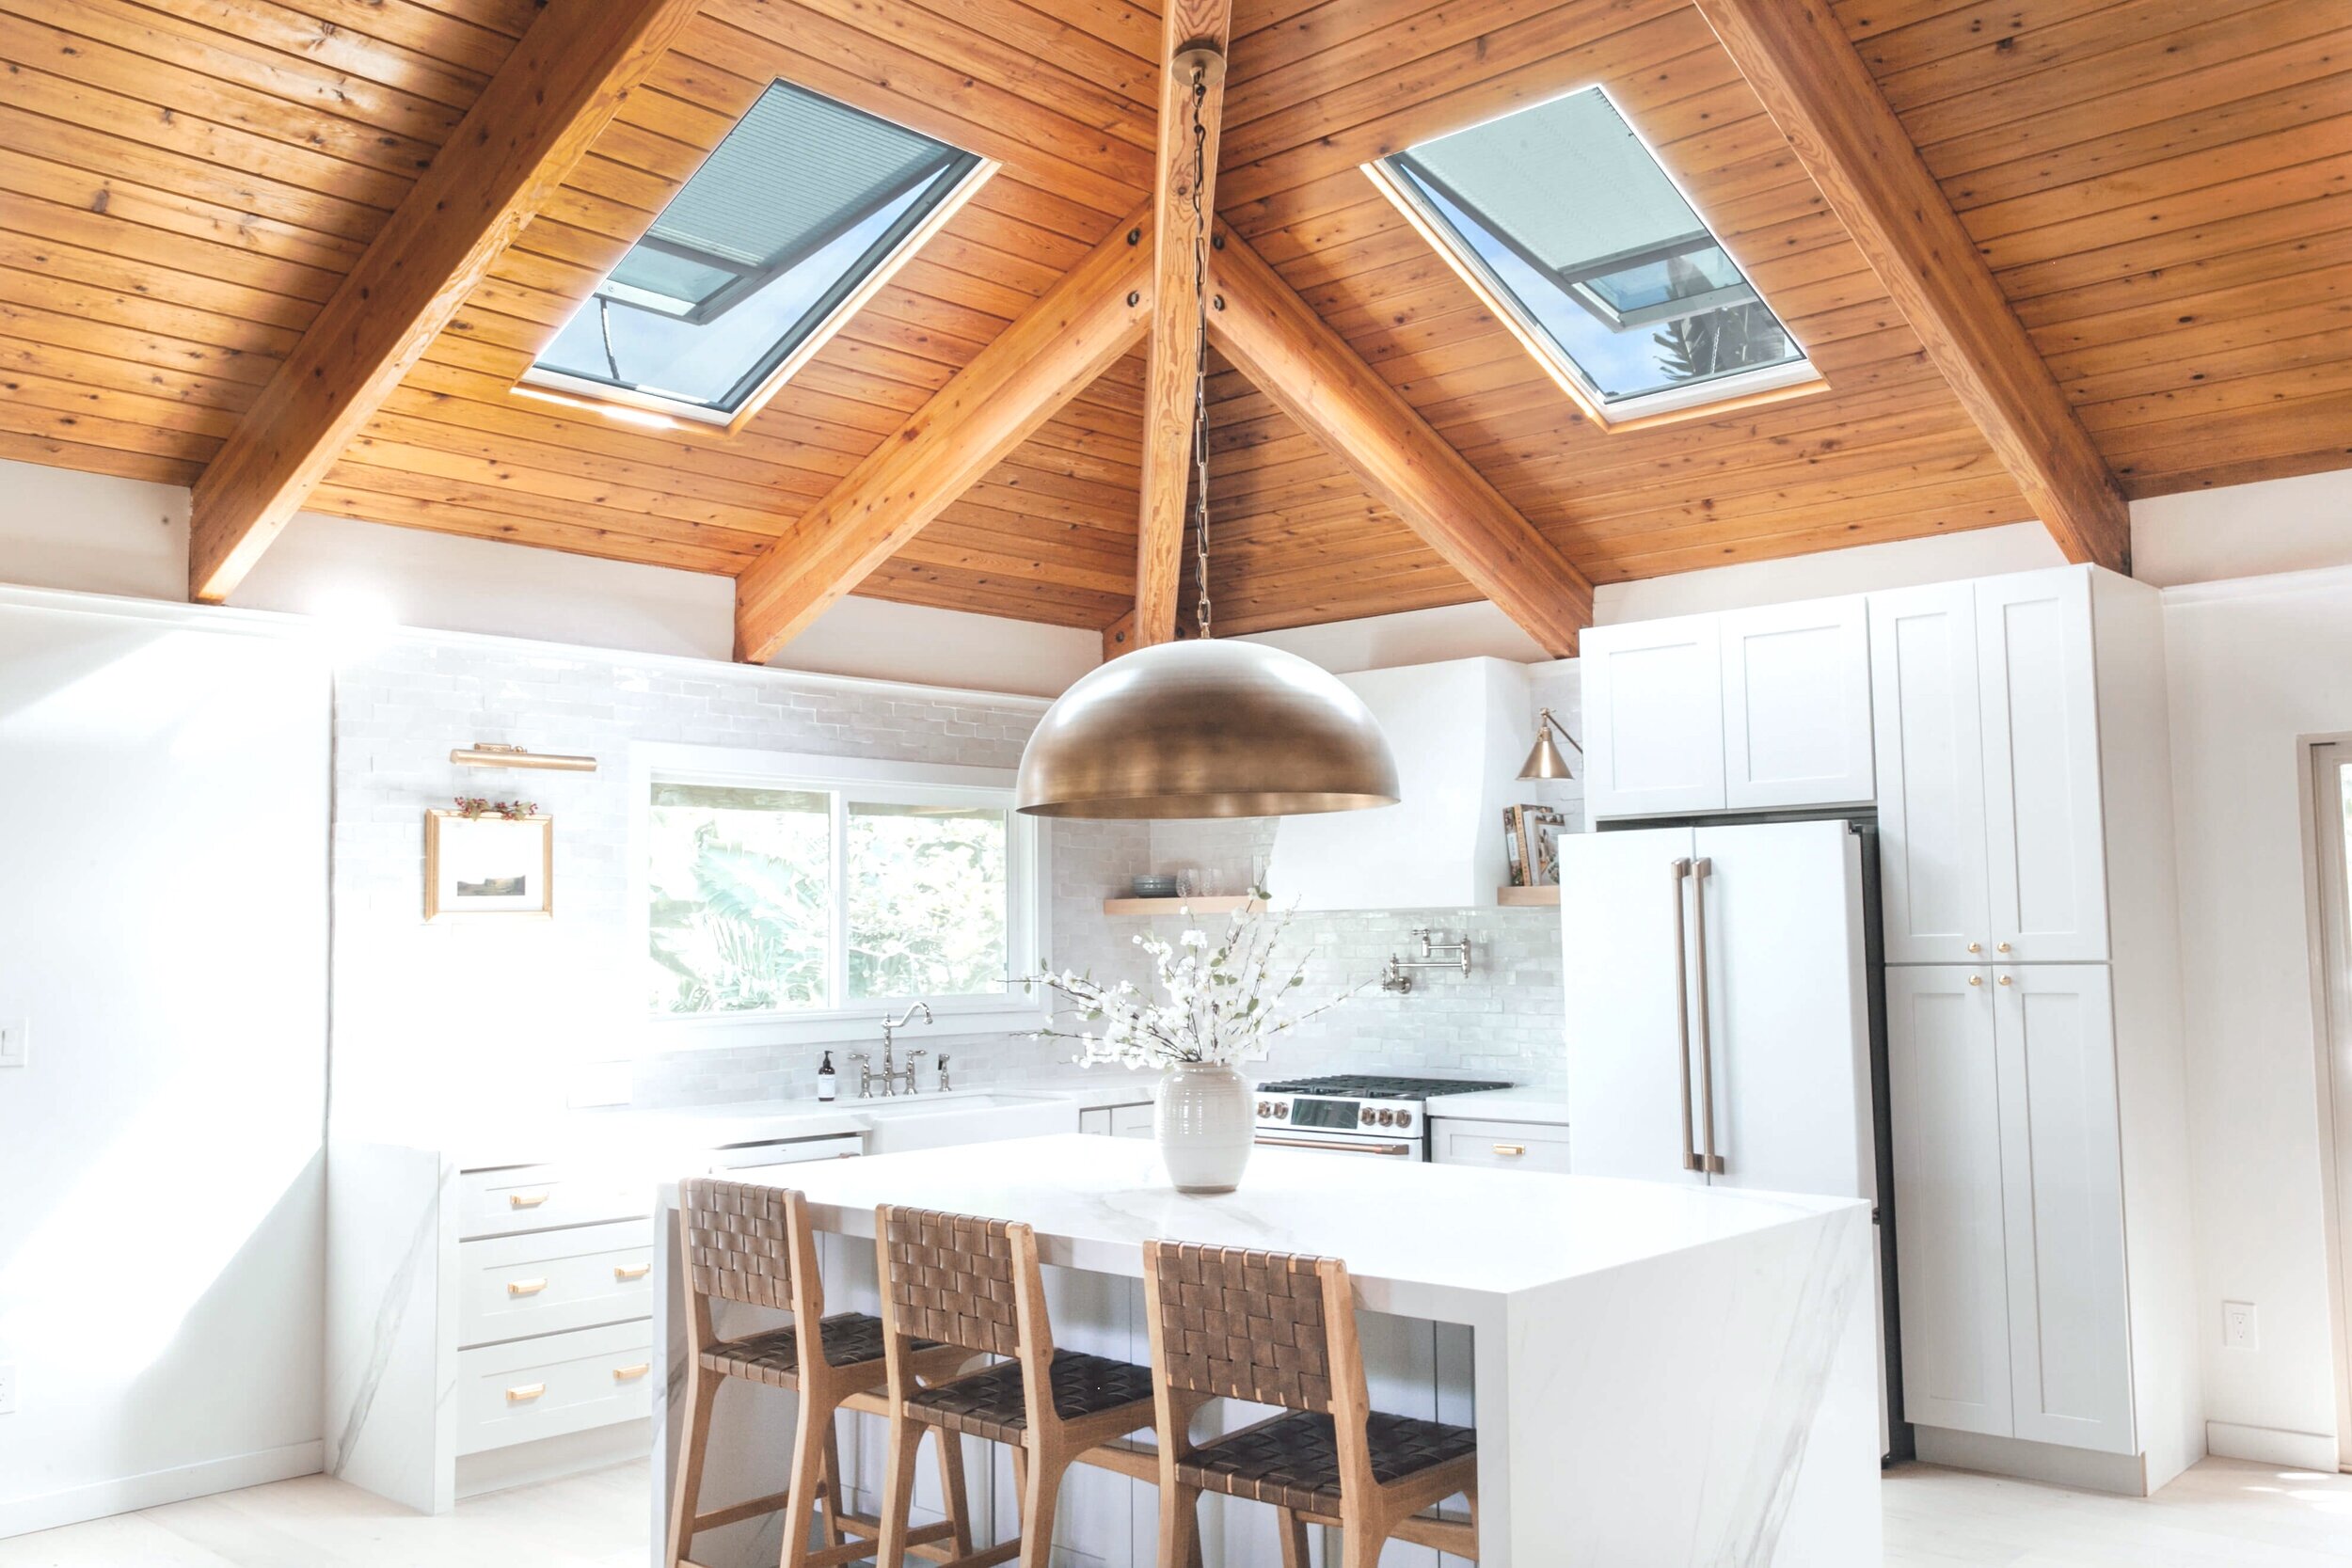
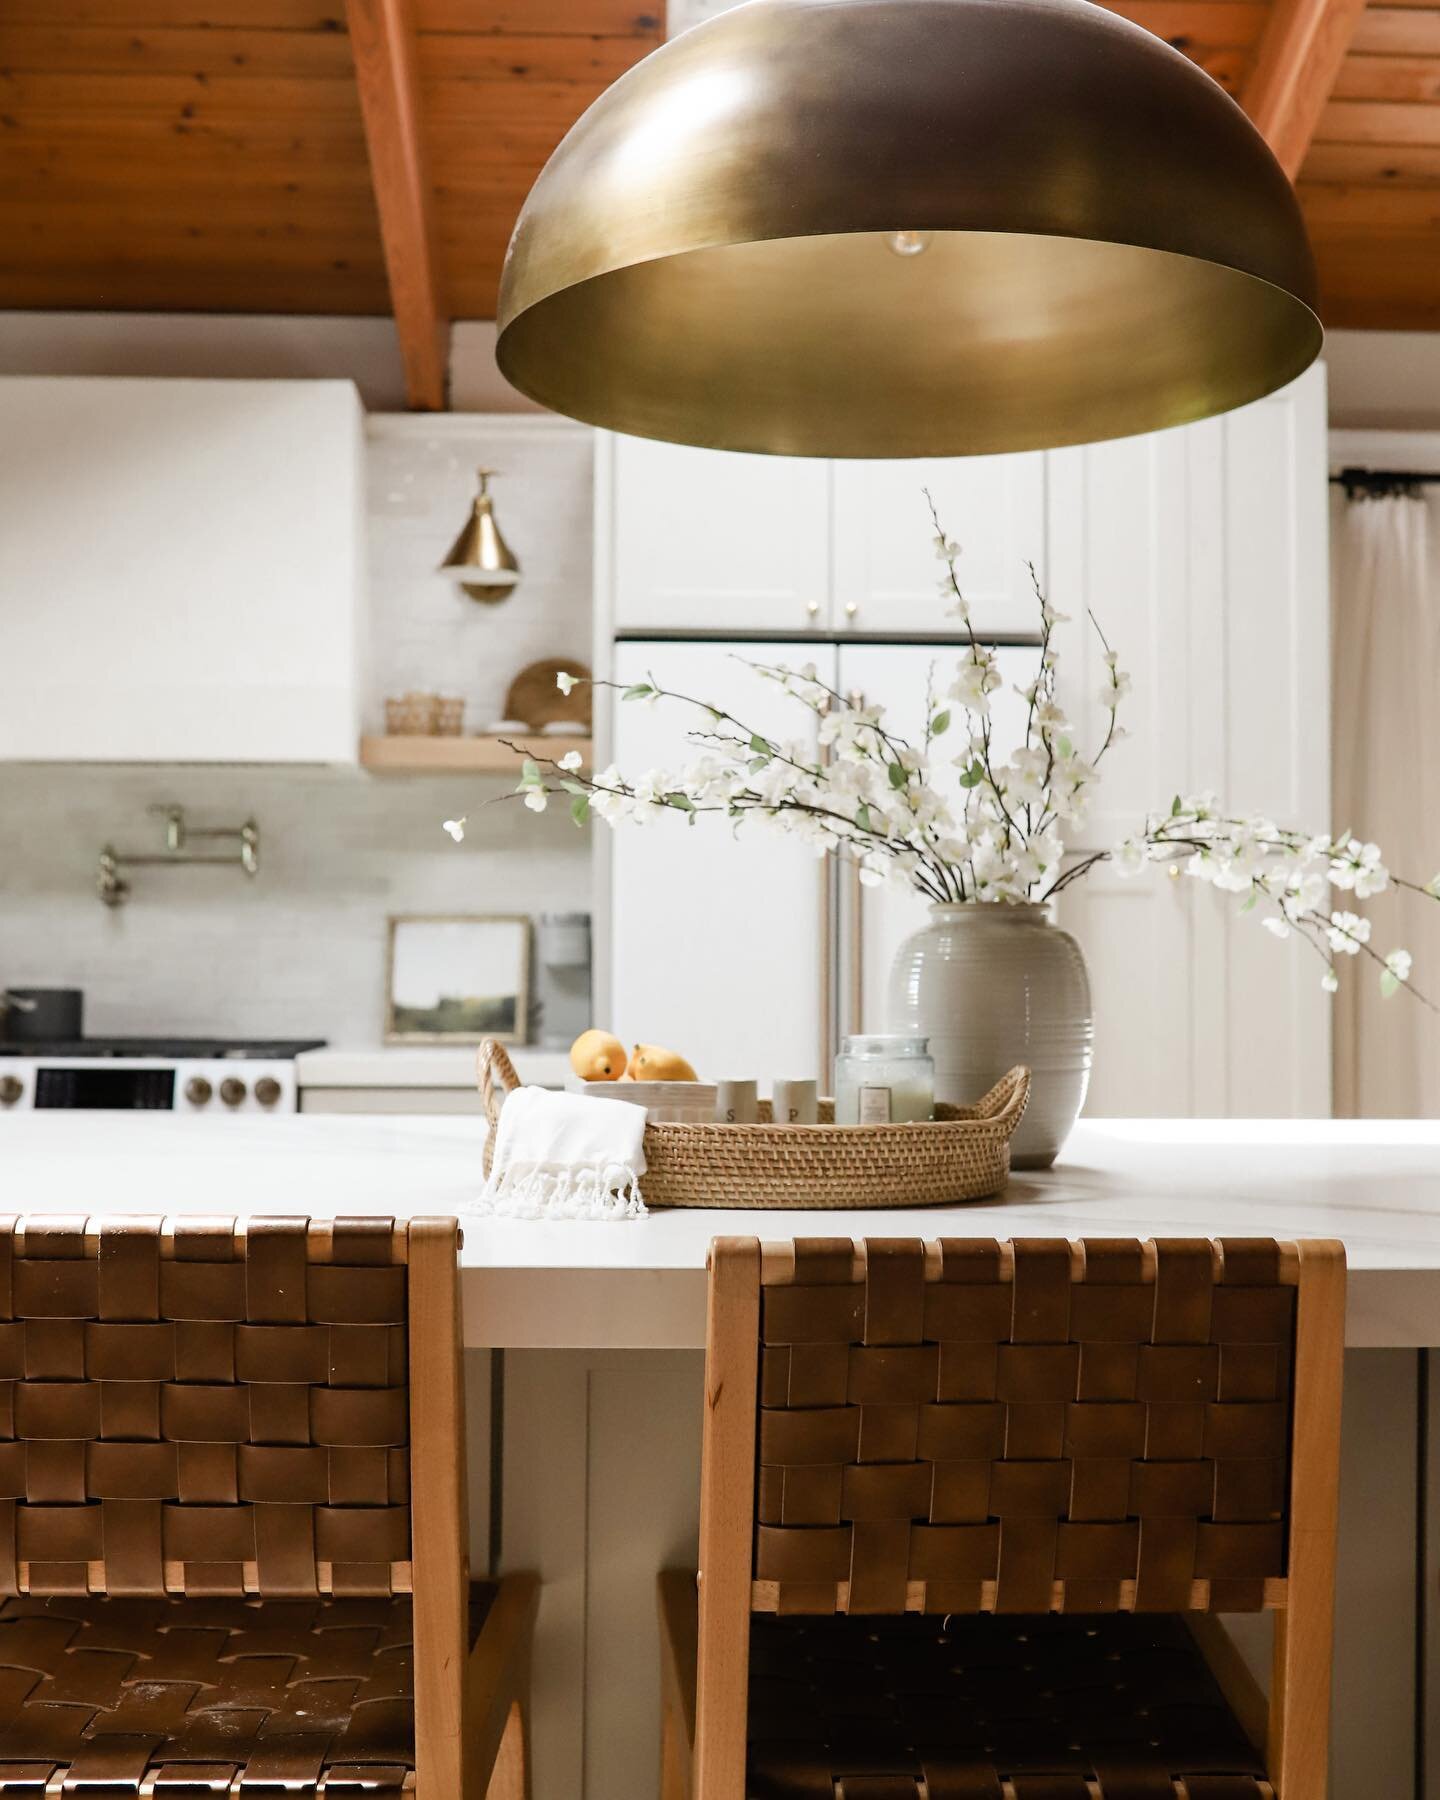
Overall, difference was mind blowing. I’m not usually dramatic, but my goodness what a game changer. The natural light just made me feel, good. I mean, really good. I feel relaxed, calm, and frankly - peaceful. Both Mike and I agree that this was 100% the right move. Now the colors in our kitchen will show true, the handmade Zellige backsplash will shine, and the space just feels more airy. Since the skylights allow the hot air that collects in our vaulted ceilings to escape, we closed up the ugly screens that encircled the room near the base of the ceiling. The room feels cooler already, and with both the windows and skylight open, I can really feel the iconic Hawaiian trade winds flowing throughout the house.
If you’re interested in a VELUX skylight (seriously, you won’t regret it), they offer free virtual design consultations. The consultant can help you decide where to place your skylights, in what rooms, and help you find an installer in your area. They also help with replacements. Schedule your consultation with VELUX here.
F O L L O W along on Instagram