DIY Fluted Doors
This blog is sponsored by Emtek and Novo Building Products although all opinions are my own.
The Plan Design Plan Adding Skylights Terracotta Tile Tufted Headboard Zellige Tile DIY Fluted Doors REVEAL
ONE week left and I’ve got a laundry list of things to accomplish. I honestly don’t know if we’ll get it done. UGH!
This week I’m working on giving our old, boring and flat doors some pizzaz! We added a laundry closet in our upper hallway area and got these super lame (and cheap) bifold doors. We also have a utility closet asI’m obsessed with the fluting trend that’s circulating (I totally think it’s OK to go with a trend every now and then, especially if it’s easily “changeable” in the future) and I decided I wanted to flute these doors. There are distributors that sell specific cabinetry fluting but, $$$, ya know.
DIY Fluted Doors


Novo Building Products is one of the sponsors of the ORC so I reached out to them to see if they had something that would work, and they did! They had a chair rail moulding that looked like it would work perfectly.


The PROCESS


First, I laid out all the pieces I needed for each door, and I only had to rip down one piece so it would fit flush at the edge. I slathered a bunch of wood glue on the door and laid all the strips on the door. I held down each piece for a few seconds and wiped the excess glue with a wet rag. Once all the pieces were applied, I used 2x4s with clamps to apply downward pressure across the door. I wrapped the 2x4s with plastic wrap so they wouldn’t stick to the wood if there were any spots where glue oozed out. Each door probably took 30 minutes to do, and we let it dry overnight!
Once the door dried overnight, Mike used a saw and cut off the excess. I used a stain blocking primer, and I tried a new thing where I put nail polish top coat over some of the knots to keep them from showing though. I know my primer was “stain blocking” and for wood, but I just wanted a little reassurance that the tannins from the wood wouldn’t show through. We’ll see!
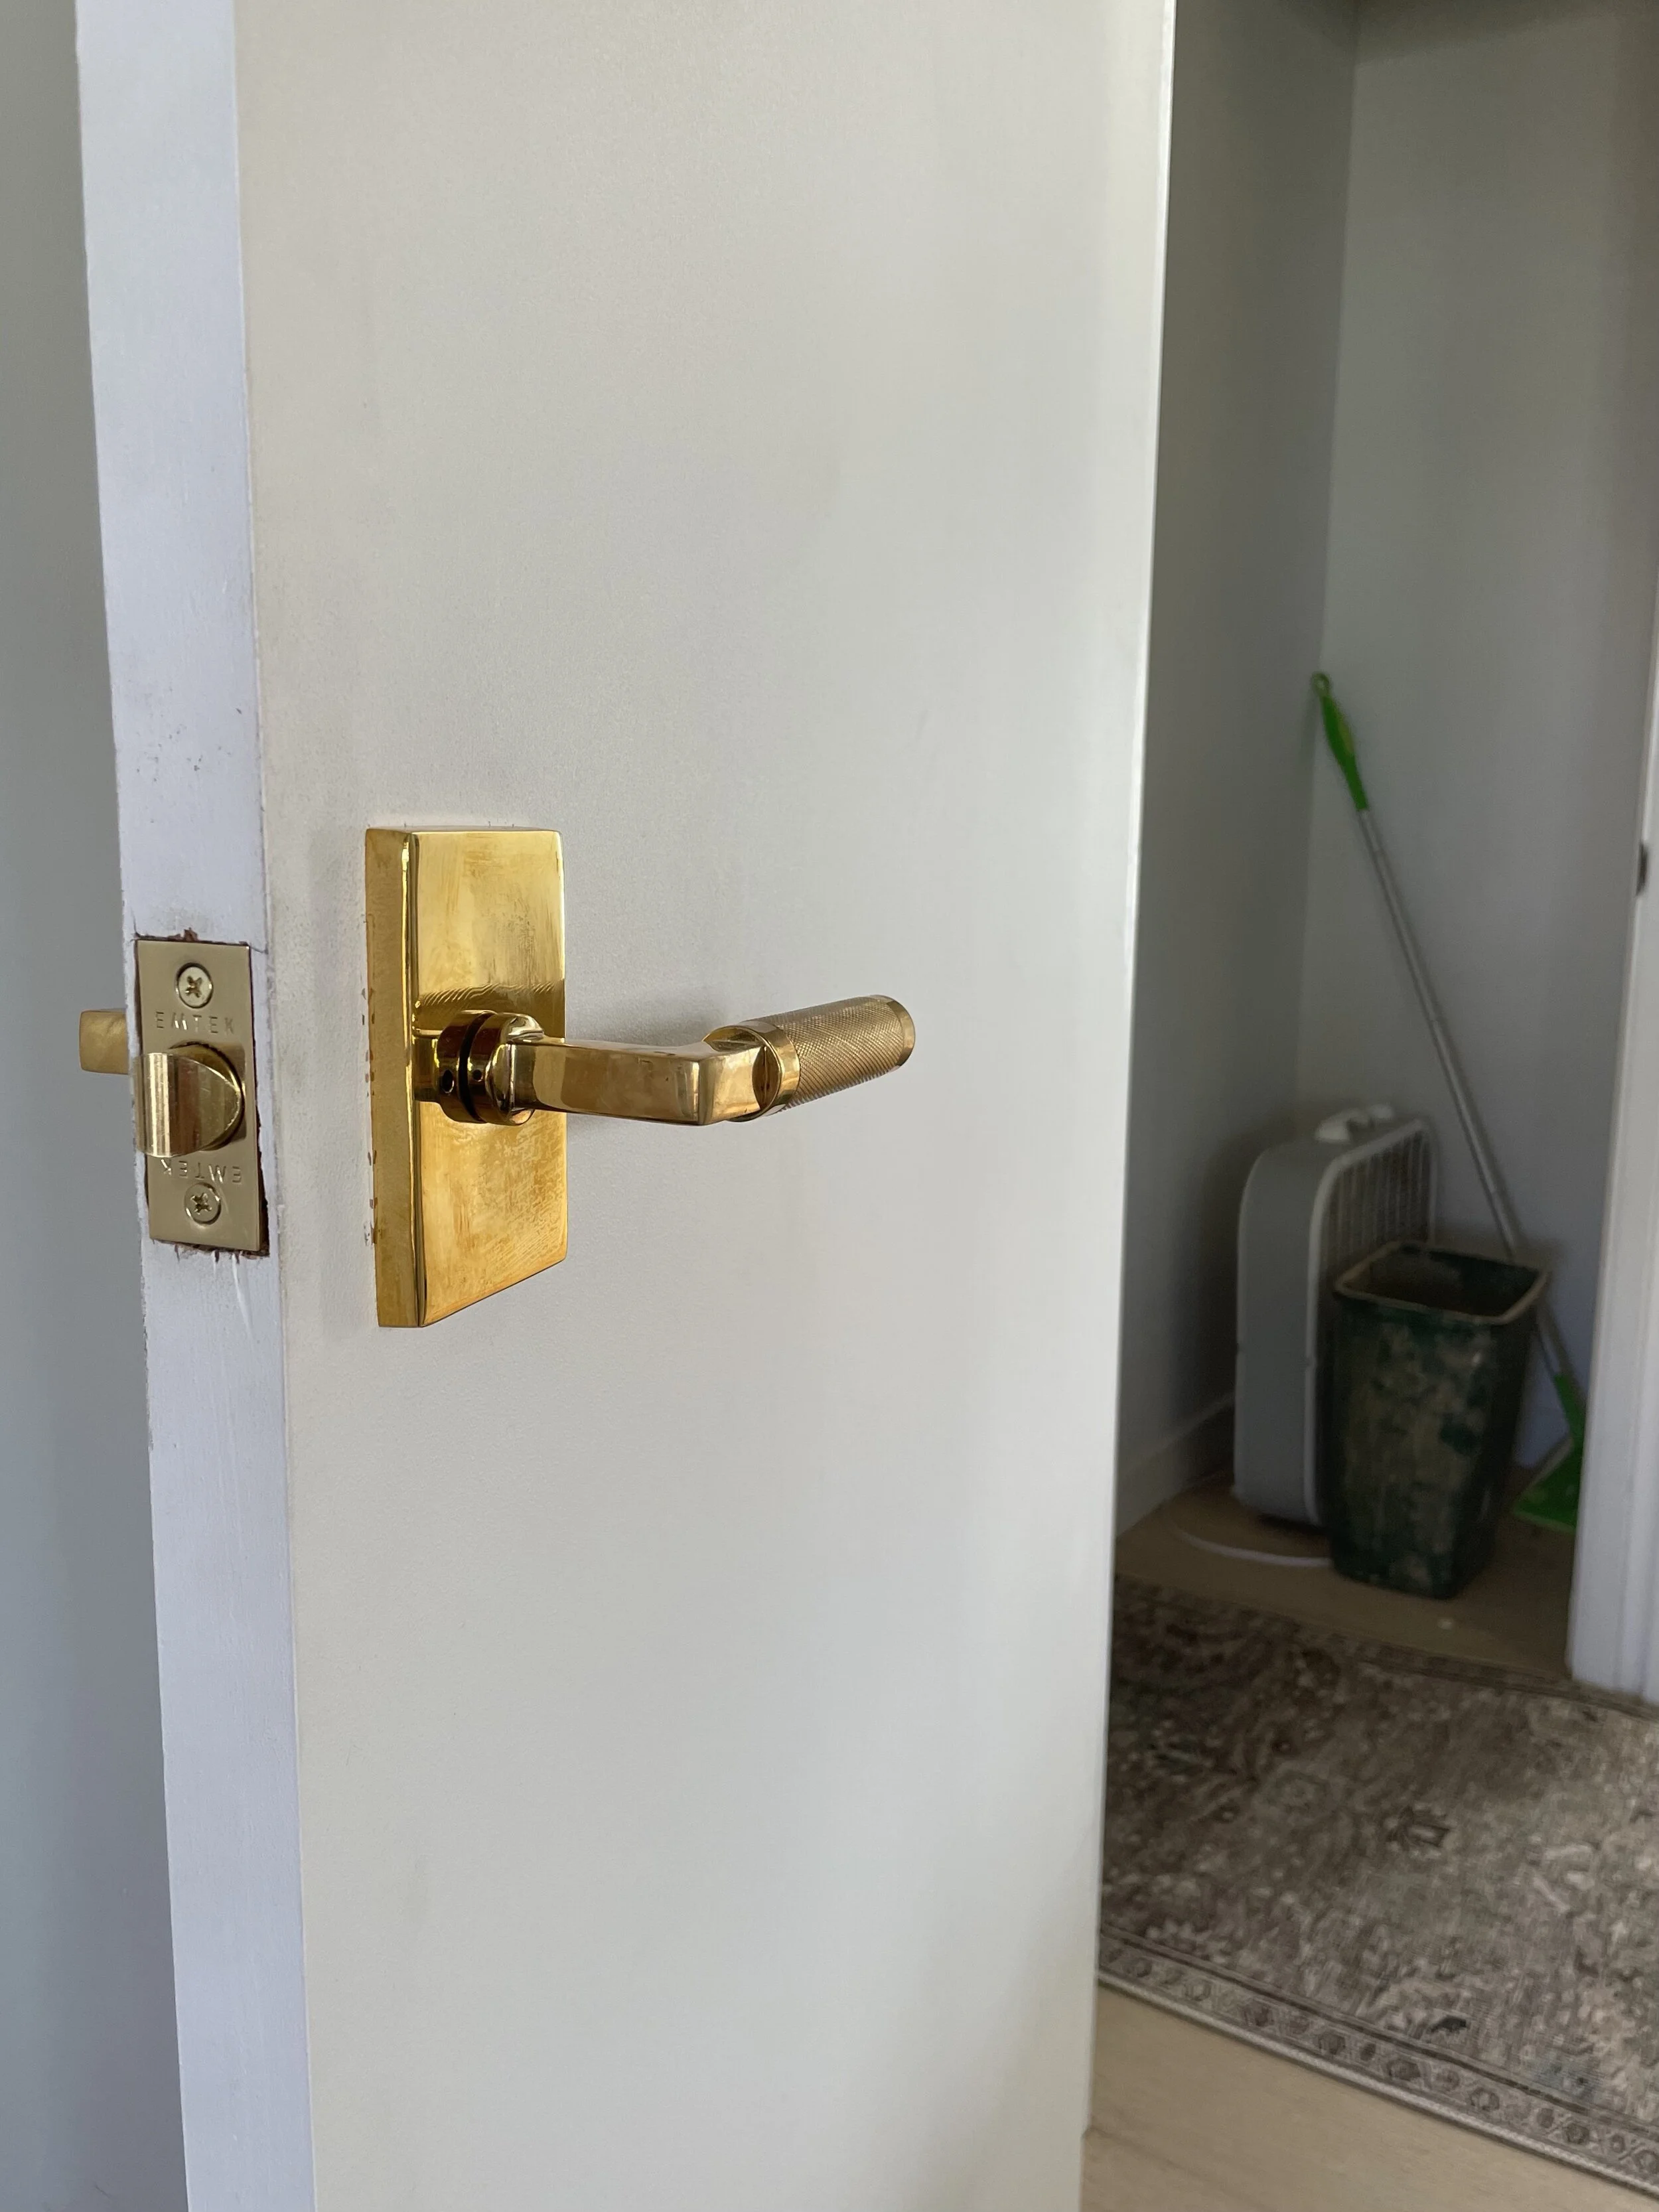
The hardware: EMTEK
For the laundry door knobs we went with the Emtek Conical Knurled Knob in ulanquered brass. For the utility closet next to the bathroom, we went with the Emtek L-Square Straight Knurled Lever with an unlaquered brass modern rosette.
Don’t worry, all the paint will get touched up!

This still needs to get installed.
I’ll update this post once we get the final doors in and the knobs installed, as of now, we still have a few more steps to do! We’ve got ONE week left and a laundry list of punch list items. These doors need to go in, the vanity hardware needs installing, and styling and photos need to get done. Will it HAPPEN?! Stay tuned.
Renovation from start to finish:
The Plan Design Plan Adding Skylights Terracotta Tile Tufted Headboard Zellige Tile DIY Fluted Doors REVEAL

Ariene C. Bethea | At Home With Ashley | Banyan Bridges | Bari J. Ackerman | Brit Arnesen
Brownstone Boys| Cass Makes Home | Dominique Gebru | Gray Space Interiors| Haneen's Haven
Home Ec. | Nile Johnson Design | Pennies for a fortune | Prepford Wife | Rachel Moriarty Interiors
Susan Hill Interior Design | This Is Simplicite | Tiffany DeLangie | Victoria Lee Jones
F O L L O W along on the ‘gram.